Setup Instructions

Find guides and videos for your Island Cruz product.

Quick Assembly Guide

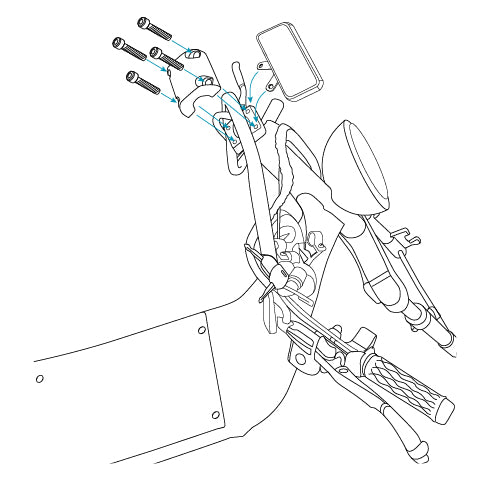
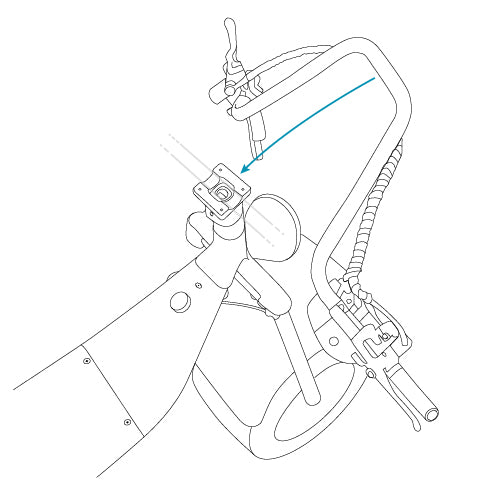
  1. detached handlebars with arrows pointing to the attachment point on the cruzer handlebar stem.

    Handlebars

    Place handlebar on bottom bracket notch.

  2. handle bars being placed on the mounting point and four screws going into the mounting plate.

    LED Display

    Align the LED display mount holes with the front bracket mount holes. Attach loosely with 4 screws.

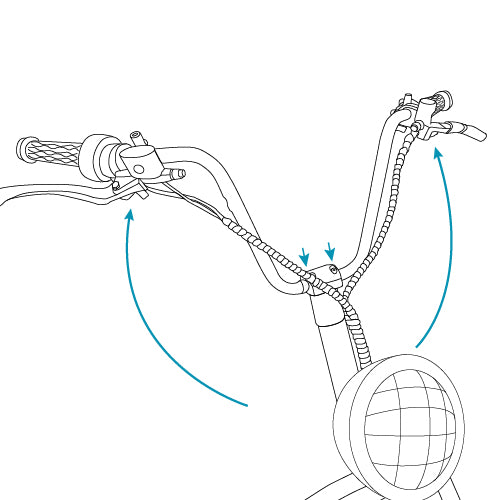
  3. arrows pointing at the top and bottom of the handlebars showing that the handlebars can be adjusted prior to tightening the screws all the way.

    Adjust Handlebars to Desired Position

    Find center and correct height. Hold in place while screws are tightened.

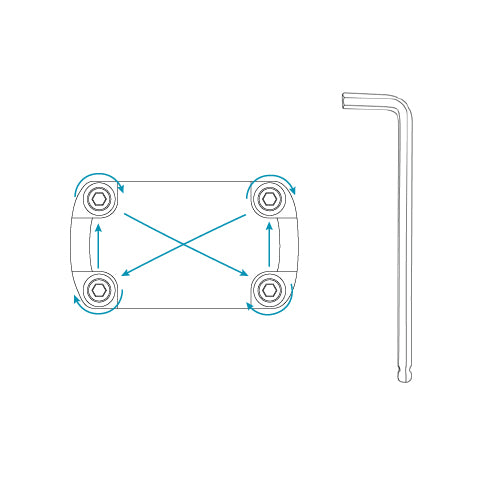
  4. a top view of the handlebar mounting plate with a hex wrench to show where to tighten each bolt.

    Tighten

    Tighten the 4 screws with the Allen wrench in a Figure-8 pattern.

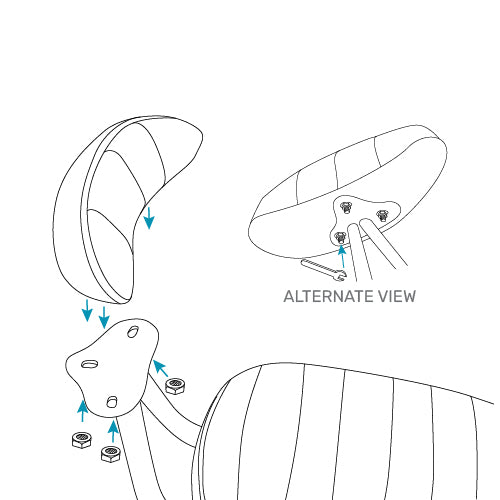
  5. technical illustration of mounting the back seat rest to the mounting plate with 3 nuts attaching to the bottom of the seat rest bolts.

    Rear Seat

    Place seat on rear support bracket. Hold in place, fastening each of the 3 nuts until tight.

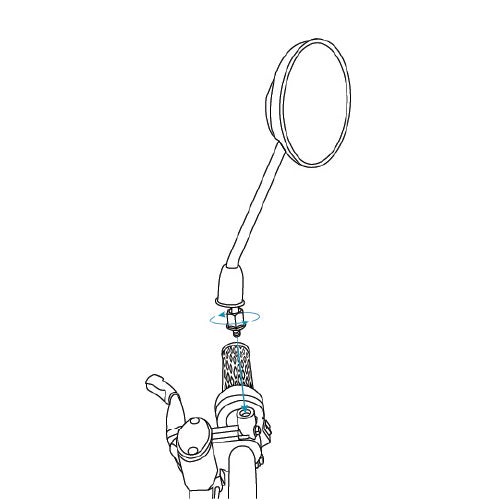
  6. illustration of the rear view mirror being screwed into place on the handlebars

    Side Mirrors

    Place mirror into threaded hole on handlebar and turn clockwise until tight. Use the small wrench to secure tightly in place.

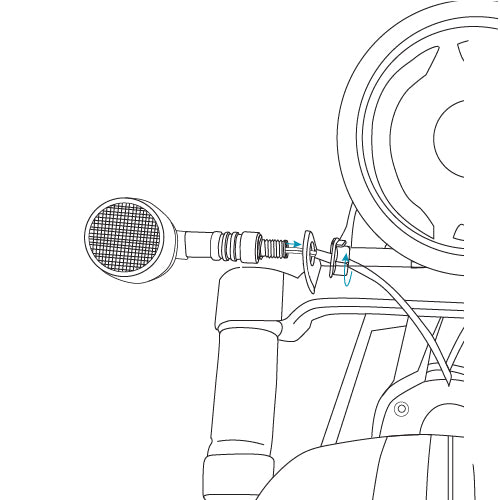
  7. technical drawing of the blinker part being thread through the metal frame into the mounting point and twisting to fasten.

    Blinkers

    Slide blinker through the metal bracket and tighten with provided blinker nut. (x2)

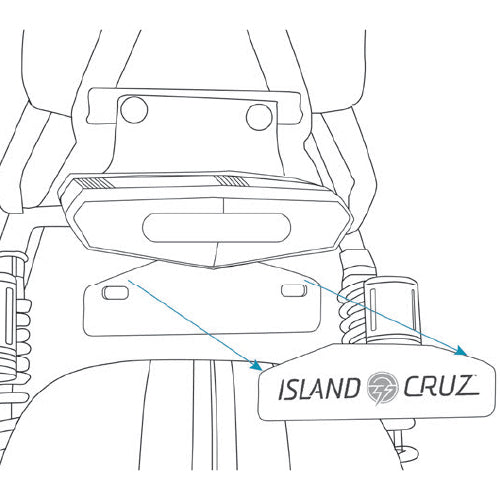
  8. illustration of the back of the cruzer arrows showing to remove the branded Island cruz plate when a license plate is needed to be mounted.
    Optional

    License Plate Badge

    Remove badge when license plate is needed.
Setup Videos

How to Unbox and Assemble Your Cruzer

How to Install a Second Battery

How to Start Your Cruzer